For years, I've painted on glass ornaments that I purchase directly from a fantastic factory in Arizona. This year with the virus spreading, their factory has had to shut down for months on end. The end result is that this fall, their warehouse was so limited in stock that they've been unable to fill orders.
My orders are included in this. I've had several hundred frosted glass ornaments on order since early this fall, but with production shut downs, they haven't been able to make them.
This unfortunately impacts several of my most popular designs, including my birch/cardinal ornament, cardinal, and loon. I've looked into several other suppliers, but the story is the same... so many of us use the frosted glass ornaments that there aren't any available anywhere.
So what am I doing about this?
Well... first of all, I'm poised to paint like the dickens as soon as my order gets delivered in December. I want to get these designs in stock as quickly as possible.
Second, I'm reworking a few of these designs to put them on other ornament colors that I do have in stock. A cardinal on a white ornament? Yes, that would look nice. They won't look exactly the same, but I hope that they'll be just as stunning in their own way.
So thank you for your patience as I work through this supply problem. I hope to get as many of these beautiful ornaments in your hands this holiday season as possible.
]]>Somebody pinch me!
Sure, I've painted and sold thousands of ornaments over the past several years. But each of those I've had a hand in selling. At craft shows, I get to meet my customers. In my Etsy shop, I often get to interact with my customers, and I write them a little note to say thank you.
This is different. Hundreds of customers will be finding my ornaments during their grand and glorious adventure in Yellowstone. Some will take them home to add to their holiday traditions.
That seems astronomically amazing to me!
If you're one of those people who purchased my ornament at a National Park, I'd love to hear from you! I'd love to know where it's new home will be. And I'd love to say a personal thank you for taking it home with you!
Send me a message by clicking here! Or click on the Contact link at the top of the page.
]]>For those of you who have followed me for a while, or who met me in person at a craft show or event, you know my shop as Phylogeny Art.
But... let's be honest. It's hard to spell. Harder to pronounce. Even harder yet to understand how it makes sense for an ornament shop. (As a scientist, I thought the name made sense with all of the paintings I was doing at the time of flowers, butterflies, and birds - those have since been moved to another Etsy shop called Harmony Mill Paperie... so since that move, the name hasn't even made sense to me!).
I recruited some help for my renaming process, and I'm thrilled to say I've chosen the perfect name.
I wanted a name that would be more approachable than my old name, of course. But I also wanted the new name to mean something.
As you know, I am a firm believer that your holiday decorations aren't just "things." Of course, they're important to you because you chose them. But they may be more important to your family. Some day, those ornaments will be cherished family treasures. And I wanted that idea to play a big role in my new name.
Cedar
As a wood, it has that warm, holiday scent. It's a hint toward the nature themes that take a prominent place in all of my designs. But it's also the wood that's used in creating heirloom cedar chests. They get passed down through the family. They hold our treasures. For that reason especially, I loved using the word Cedar.
Pearl
Cedar, alone, would be misleading. I don't really use wood in my artwork. In fact, what I use is breakable - the opposite of a sturdy piece of wood. For that reason, I decided to pair the steadfast "Cedar" with the precious "Pearl." As a piece of jewelry, pearls are family treasures passed down through the generations. They hold a special place in our life events, like weddings. But their delicate, round shape helps connect to my ornaments, hanging like precious pearls on a tree.
So there you have it. Cedar + Pearl, a rebirth of sorts for my business. I hope you love it as much as I do...
...especially because you'll be able to pronounce it when someone asks, "Where did you get that beautiful ornament?"
]]>I had sent in a message to a contact form. You know, the kind where you hope someone is monitoring it? (My contact form is definitely monitored, by the way!)
Well, within an hour I had an answer. The company that runs concessions in several National Parks was on the other end of that email, and they were interested in my ornaments.
My ornaments.
Squeeee!!!! The joy that was pumping through my heart at that moment was immense.
So I mustered up the most confident, professional response I could. Of course, I had to include something to show my excitement. Something like, "I'm thrilled to hear back from you," when what I really wanted to say was "You really like me? Awwww! Let's be best friends."
After lots of logistics, planning, designing and setup, I'm thrilled to announce that my ornaments will be headed to two National Parks this summer.
First up, Yellowstone National Park, which is re-opening for the season at the end of April. They'll have 5 of my ornament designs spread across their 10 gift shops. They include some of the most iconic scenes of the park, including Mammoth Hot Springs and Old Faithful!
(Did I ever, in a million years, think I'd be painting Old Faithful on an ornament? Well... yes, because I painted one for my family and one for my parents a few years ago... but not for hundreds of other people!)
Next, Rocky Mountain National Park, which is re-opening for the season at the end of May. They'll have 5 other ornament designs in their gift shop, mainly highlighting the deer, moose and birds that call the park home.
I'll be putting together a page on this site to give a behind-the-scenes look at the creation of each ornament design. When it's ready, I'll post a new blog post about it!
]]>I had just left my job unexpectedly after 7 years. I didn't know what I was going to do, but I knew I had plenty of options. With my background in science and management, I could get another lab job in no time.
But did I want to? Was this a turning point in my career, and my life? One where I could actually consider what I wanted, instead of what was the logical next step.
So I sent that email. Actually, I submitted a message on a contact form. It basically said, "I'm an ornament painter in upstate NY, and I'm curious if you might be interested in what I create."
Within an hour, I had my answer, and it was "yes."
Doubt crept in. This has always just been my hobby. I'm a scientist. I need to find a job in a lab.
But then my heart and a bit of faith took the wheel. I can do this. I'm meant to do this. This was the gift that I was given.
Sure, ornaments may seem simple compared to microscopes and proteins. But microscopes and proteins don't touch people's hearts. (okay, nerdy science moment... in my previous work, they did. We studied motor proteins that are involved in heart contractions. But I digress).
So this is my new reality, and I plan to make the most of it. Where will it take me? I don't know. But I'll share with you next week where it's starting.
]]>When I saw it, I thought it was gorgeous. Then I realized that placing those petals would drive me crazy.
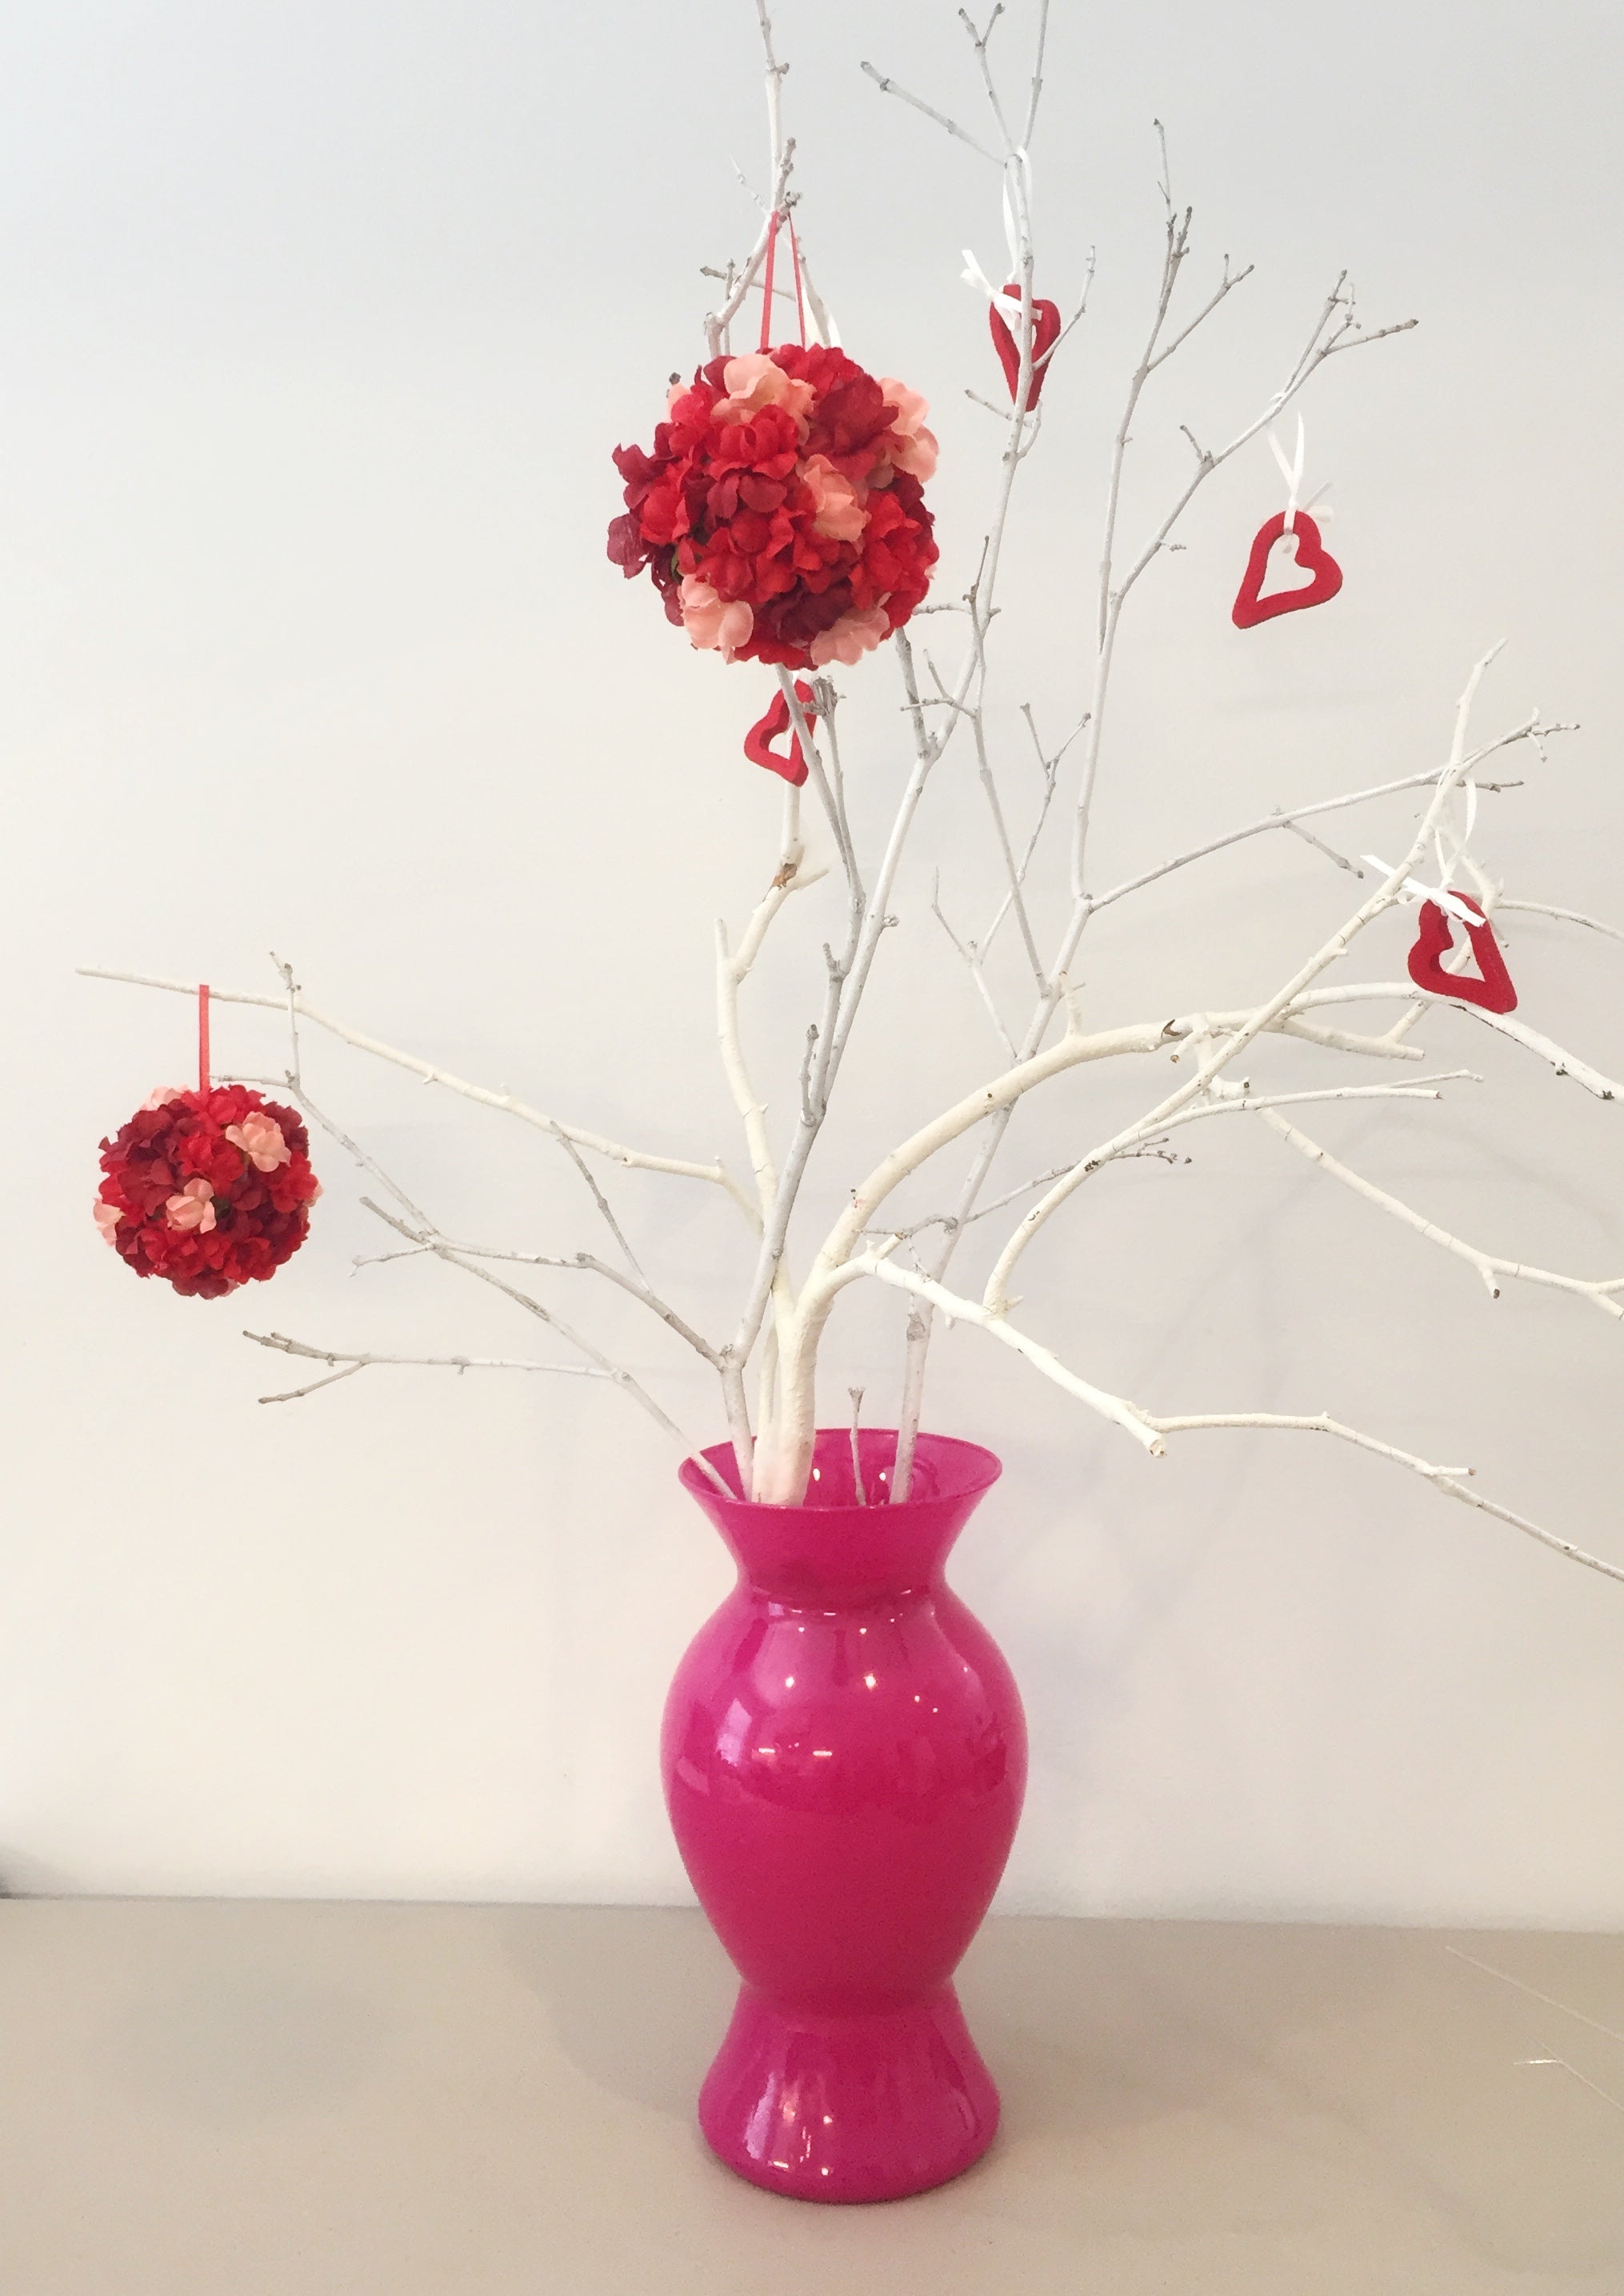
So this last DIY in the series is my way to add a floral touch to your tree centerpiece that we made in Part 1. It’s more advanced than the other steps, but it’s not too difficult – I’d say a 6 out of 10 on the “crafty scale.”
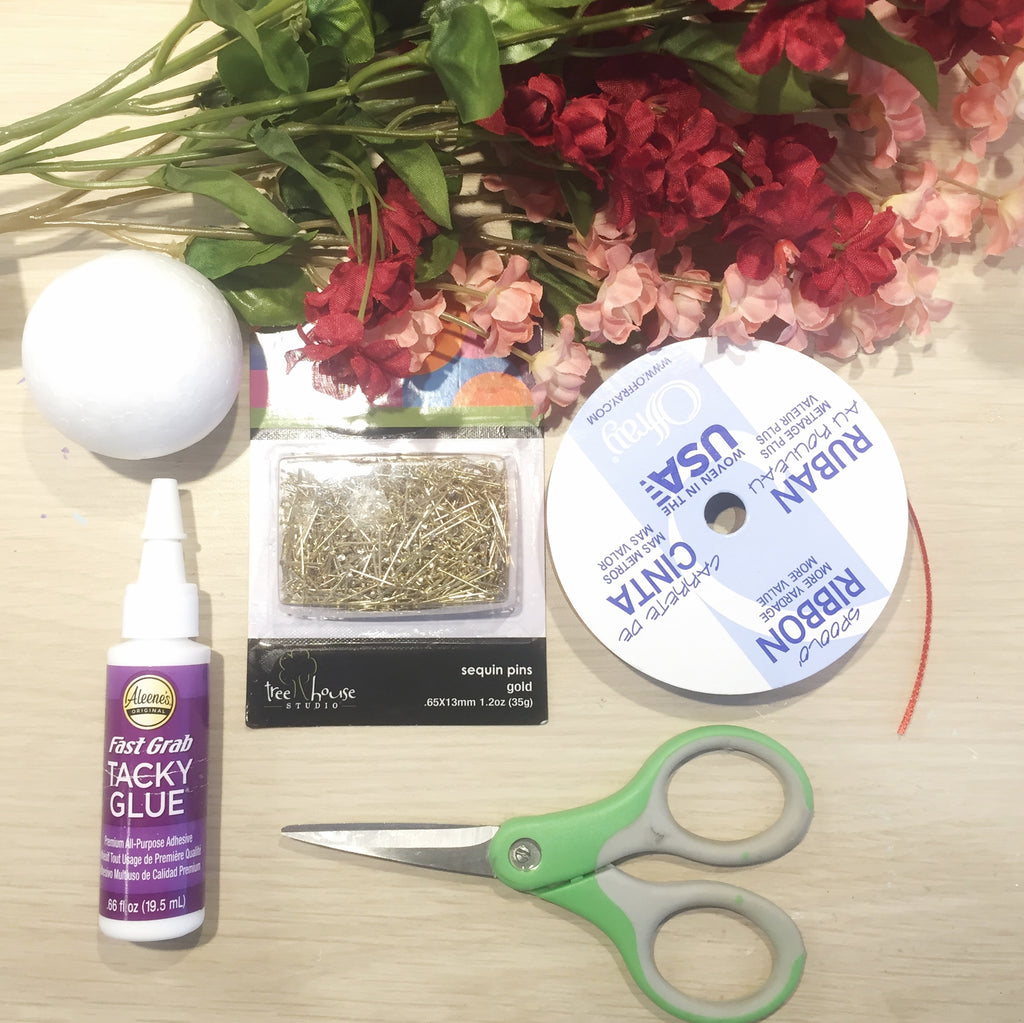
Styrofoam balls - mine are 2.5" diameter
Fabric flower stems with small blossoms (choose 3 colors)
Sequin pins or straight pins (short)
A bottle of craft glue
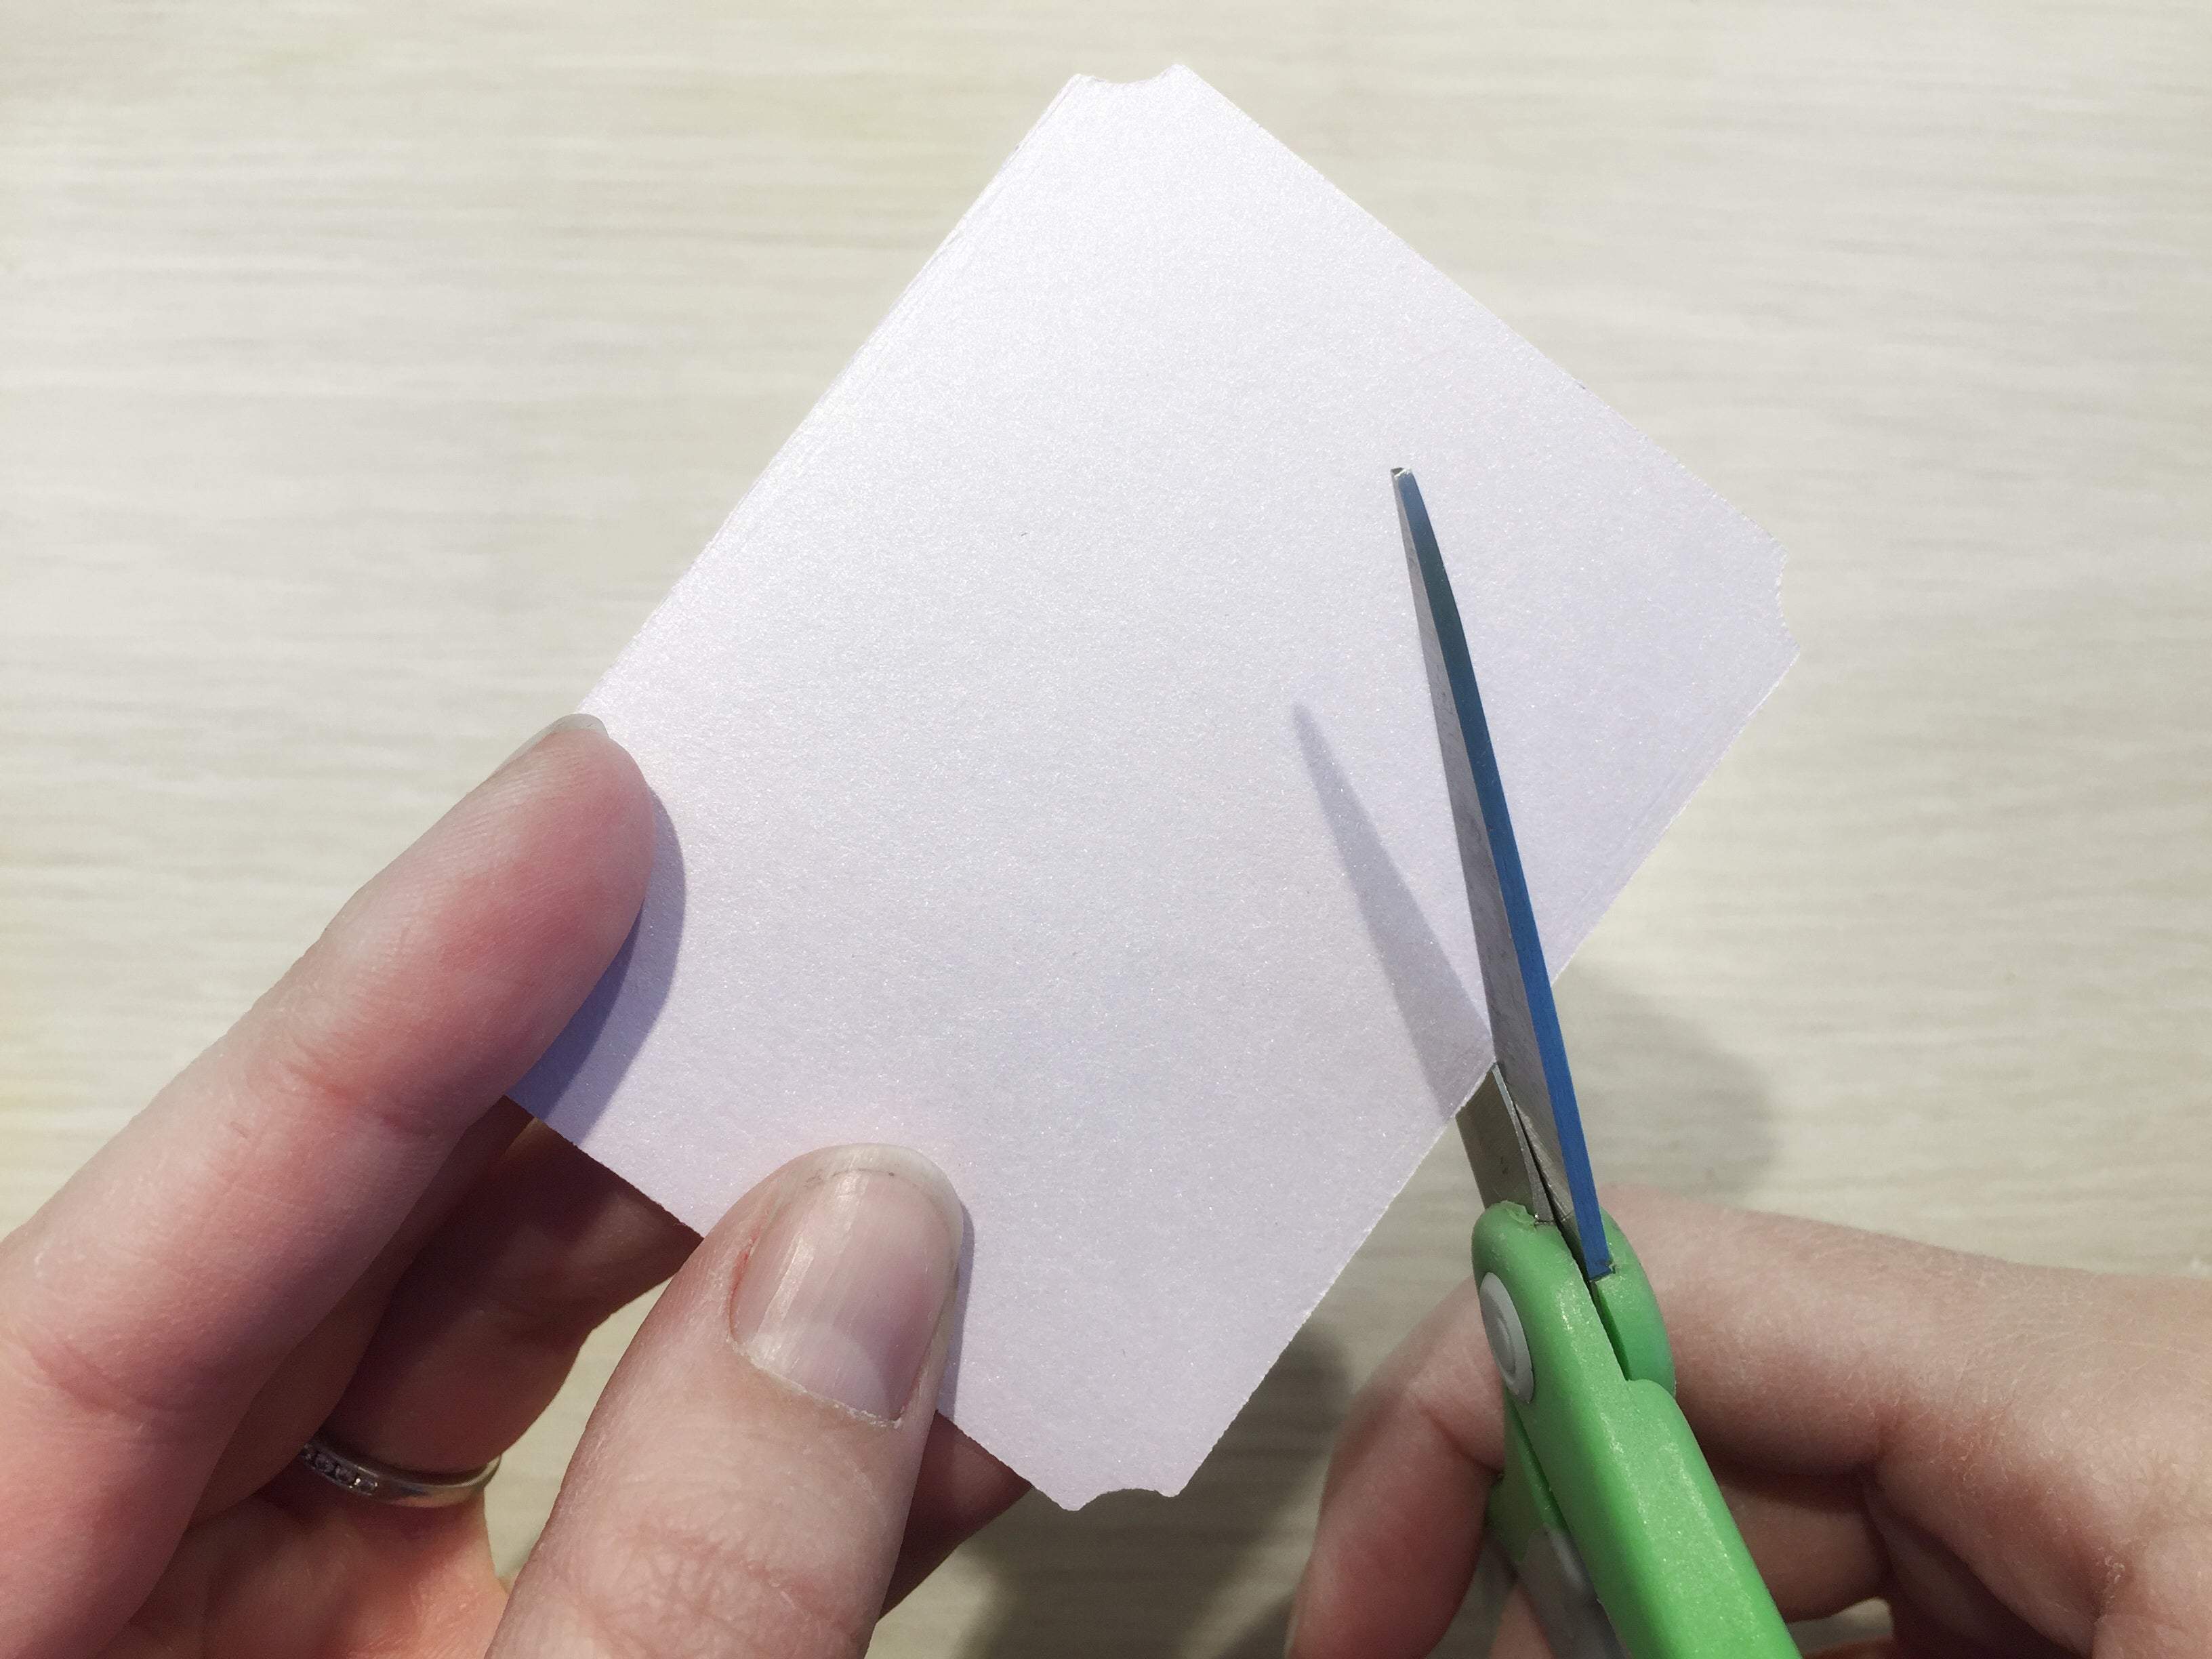
Scissors
Ribbon
A thimble is helpful
Tea or coffee
A Hallmark movie
The first ball will take a bit of time to figure out, but then it gets quicker. I was able to make 4 of these in about 90 minutes.
I spent a long time at two craft shops looking at fabric flowers. Here's what you want to find. You'll need to have small blossoms so the ball still looks like a sphere. You want to find 3-4 colors that go together, at least (2 looks blotchy, 4 would be lovely too). They don't all need to be the same type of flower, but similar sizes would help. The ones I got were from AC Moore, and they were $1 per stem. Since 3 stems can make 4 balls, that seemed like a great deal. I didn't want to spend too much on this DIY!
1) Cut a piece of ribbon 3" long. Loop it so the ends overlap by about 1/4" and place a pin through the cross.
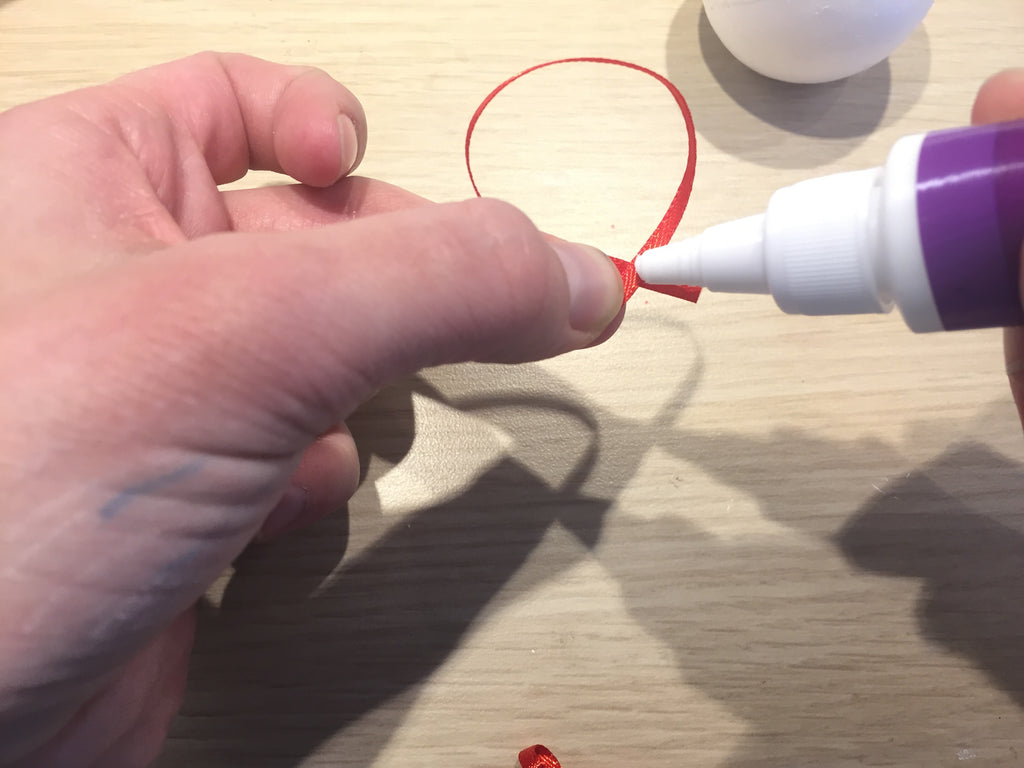
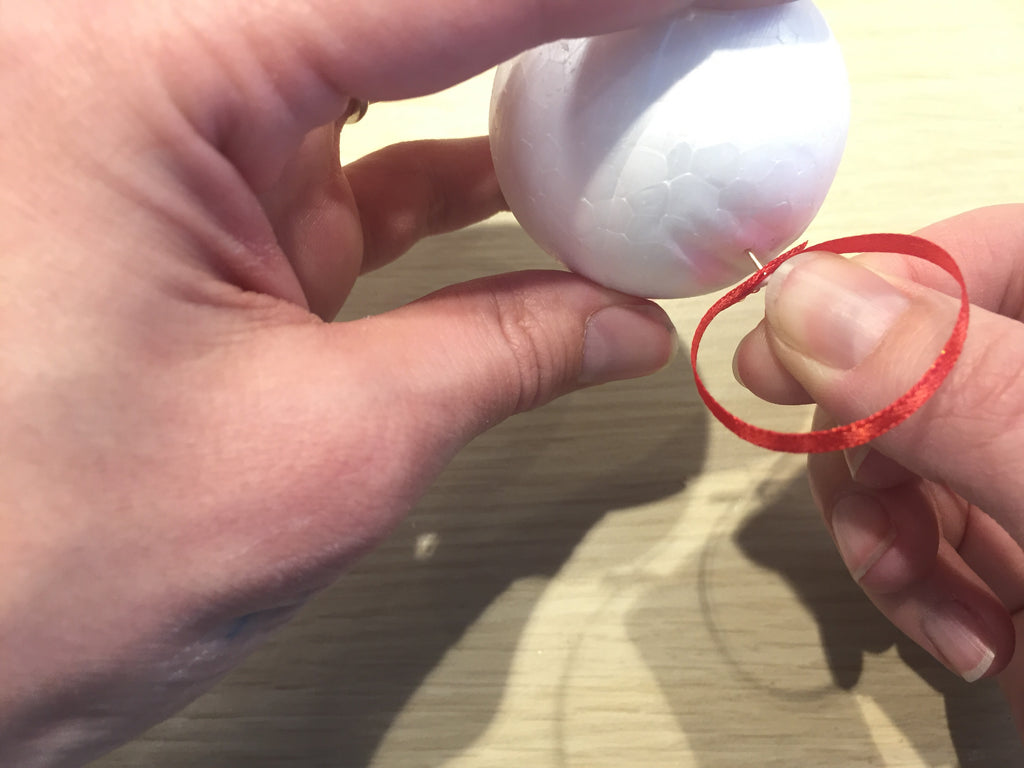
2) Dab a bit of glue onto the ribbon/pin and push the pin into the top of one Styrofoam ball. This is your hanging loop.
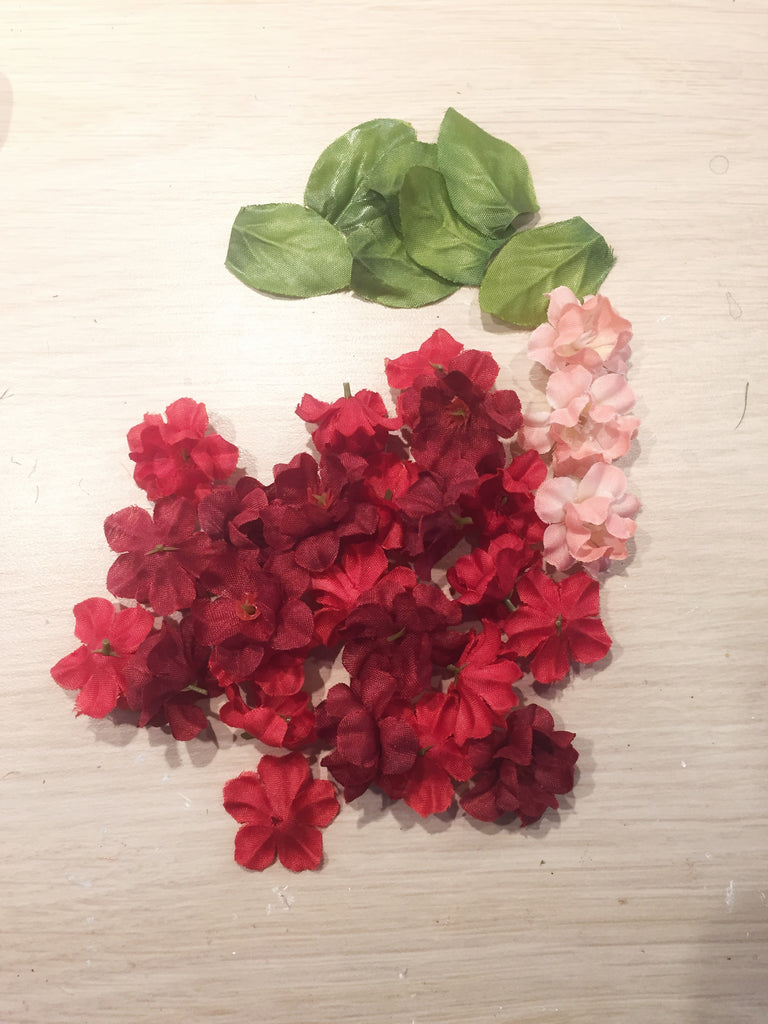
3) Cut leaves off of your floral stems. I used around 13 leaves per ball.
4) One at a time, put a dot of glue onto the ball, place a leaf onto the glue and put a pin in the center to hold it in place. The leaves do not need to overlap, but just cover most of the ball.
*If you didn't want to/couldn't do this step, you could paint your ball green and let it dry. This way any open space between the flowers isn't "Styrofoam white".
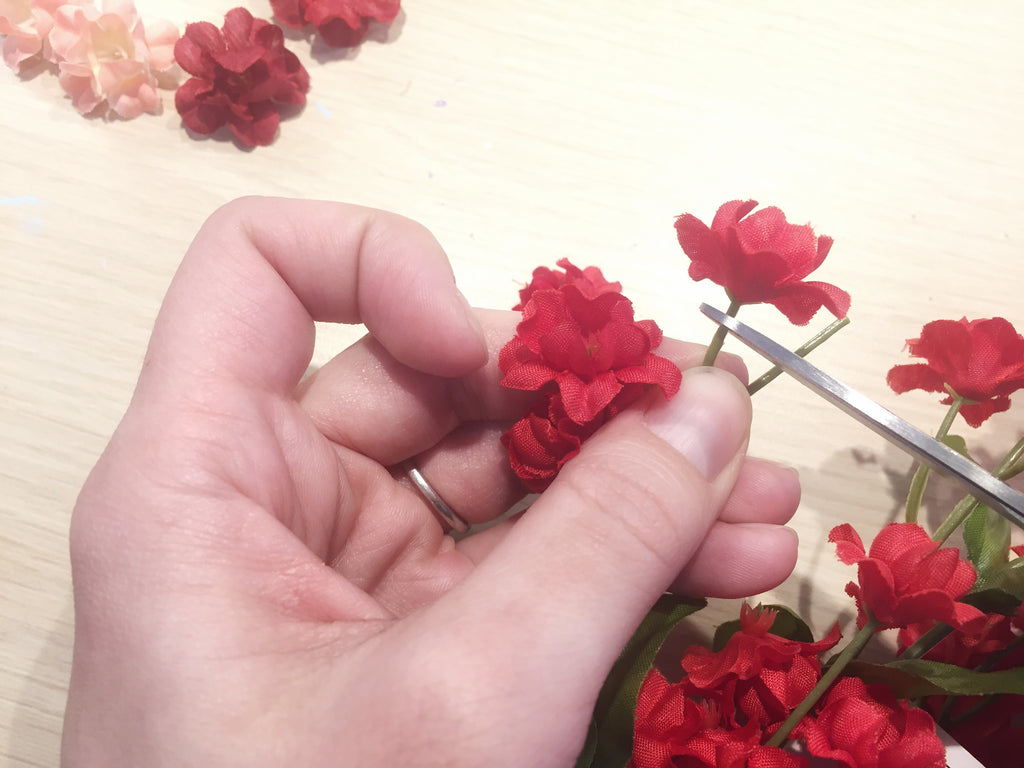
5) Go to town cutting blossoms off of each stem. I just cut them all off and made piles of each color! The key is to leave a little nub of the plastic stem on the back - this way the flower stays assembled and keeps its shape.
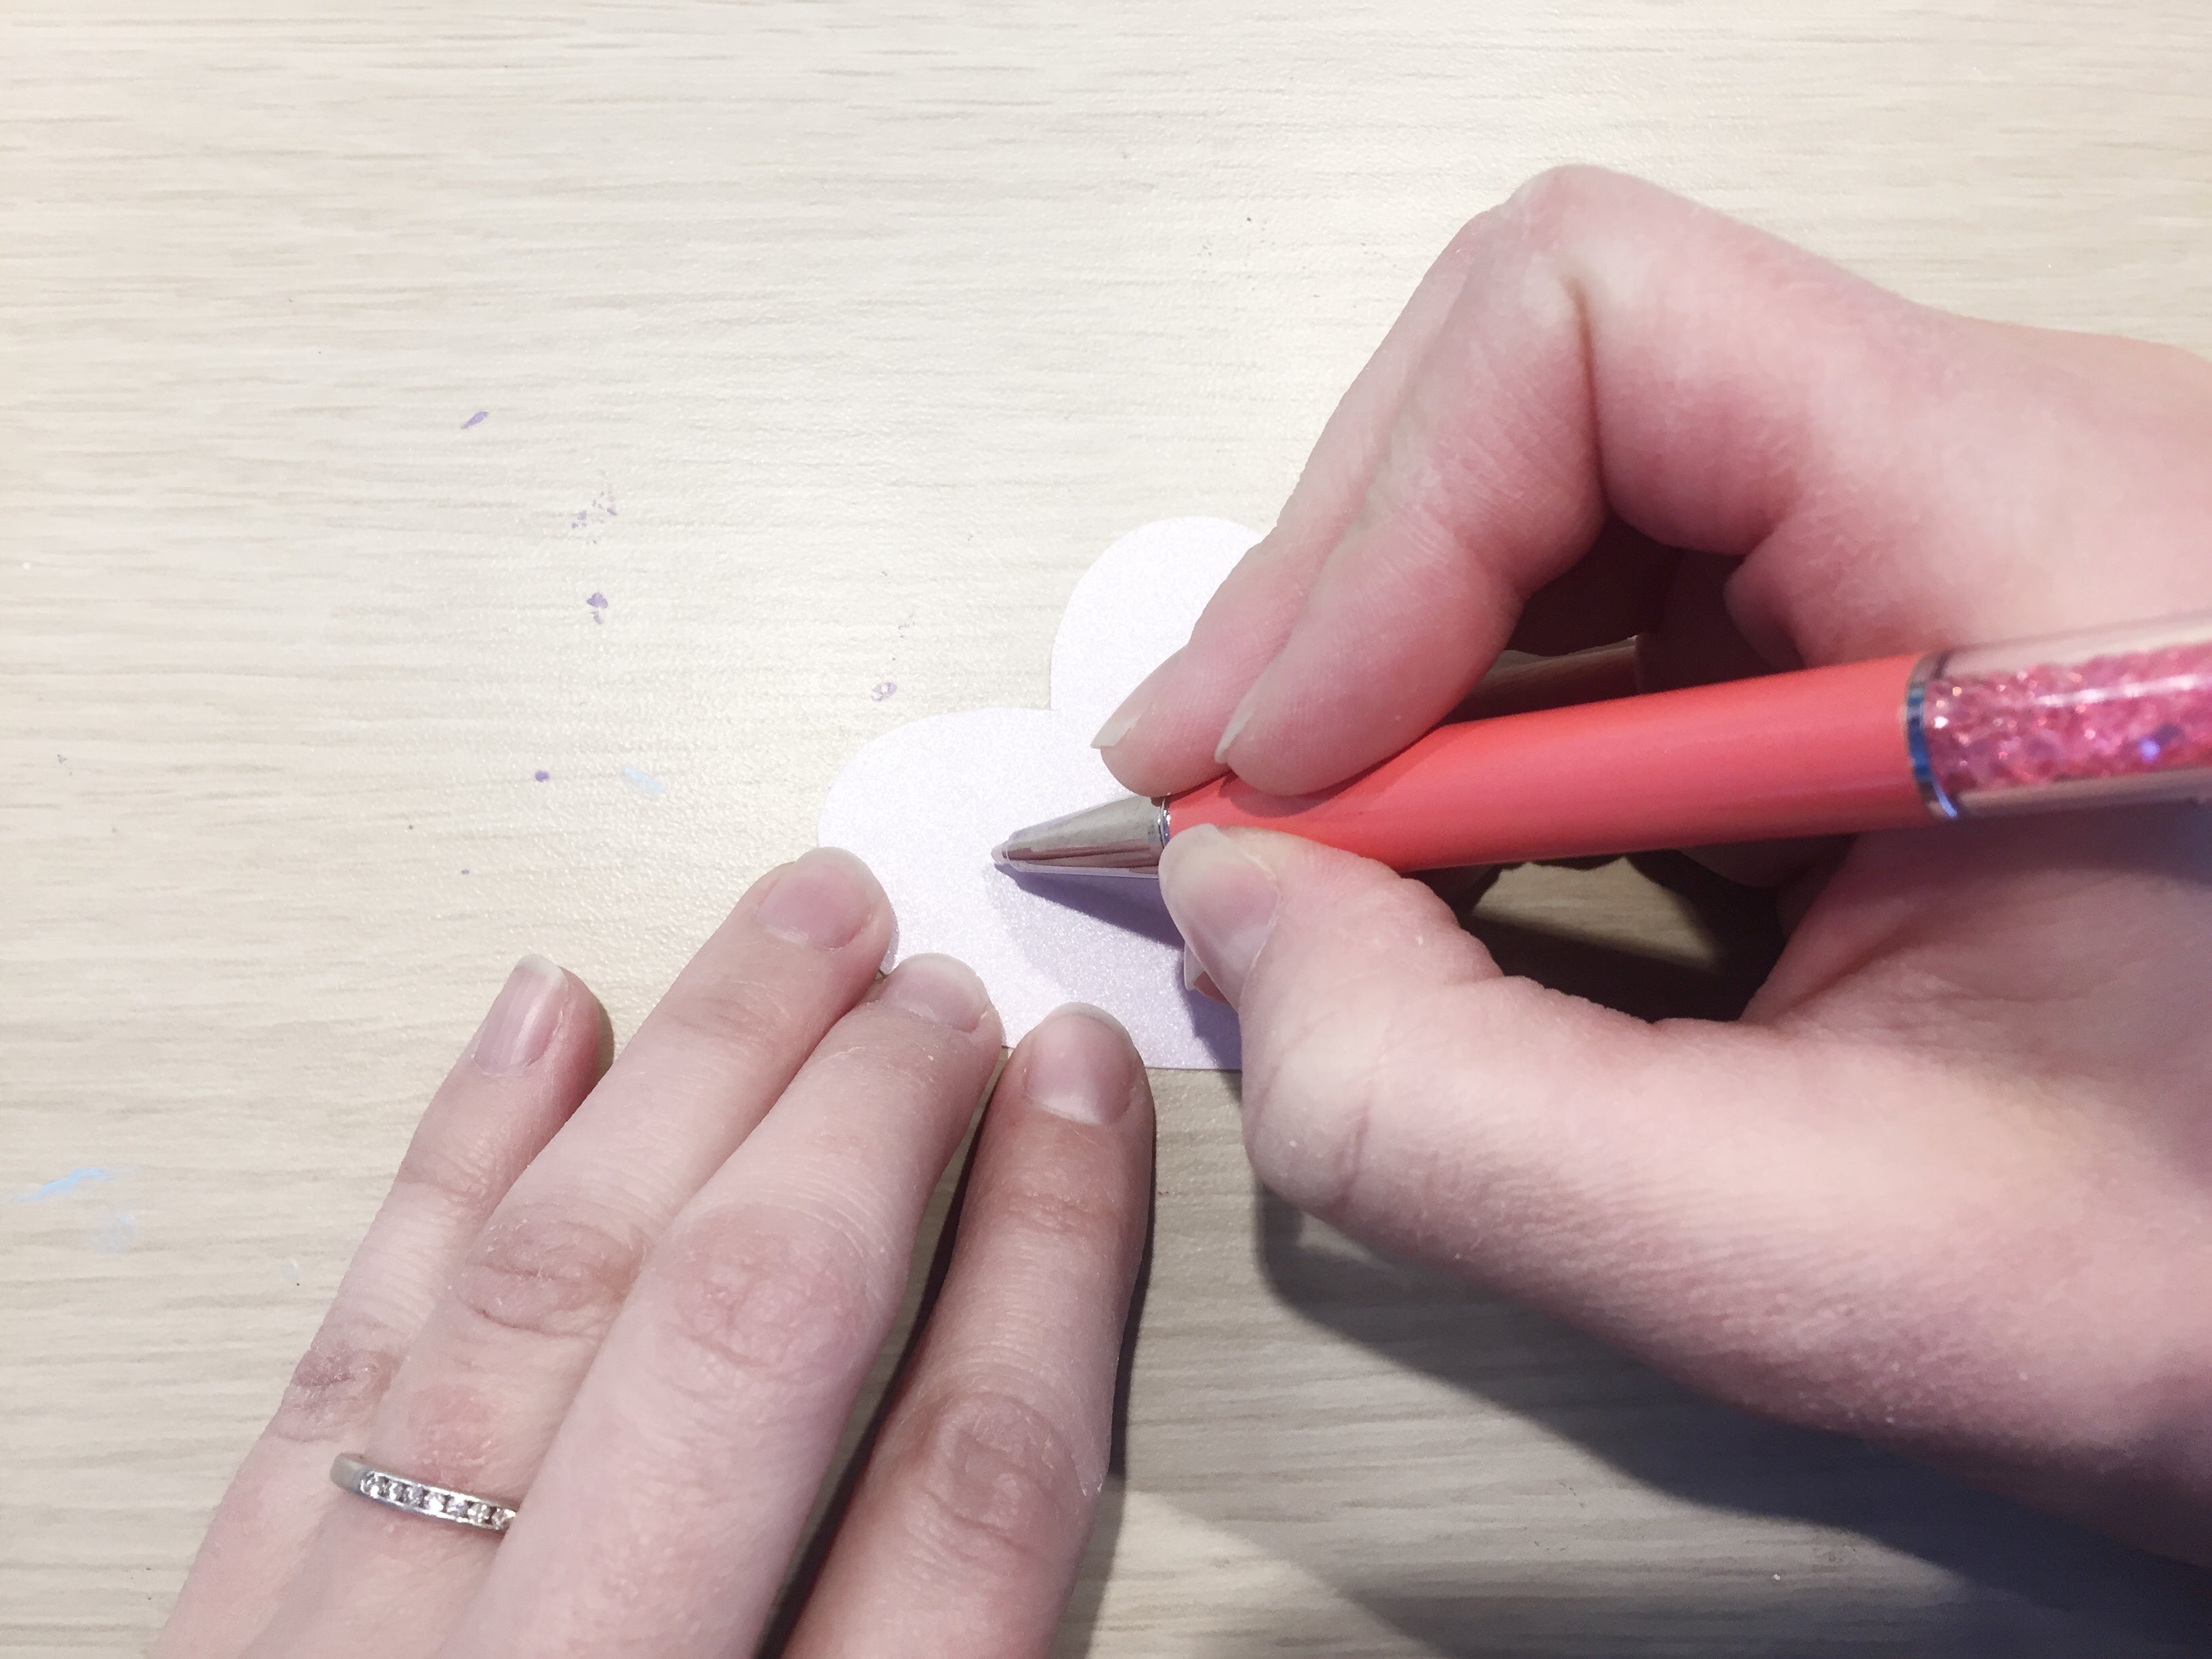
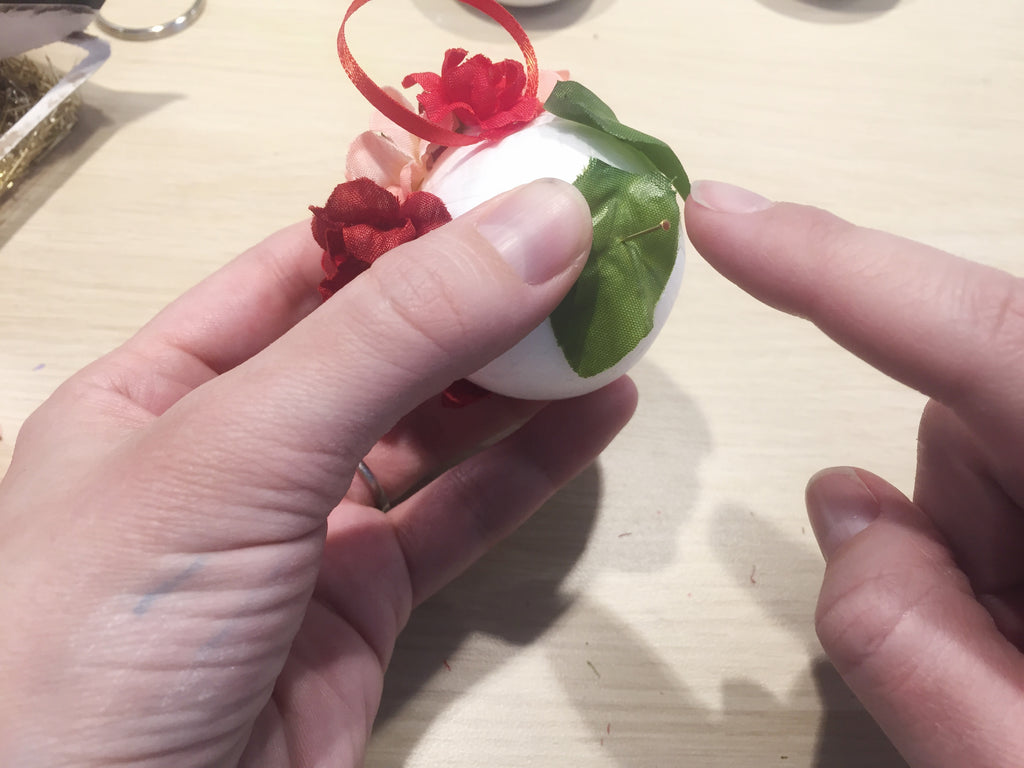
6) One at a time, pick up a blossom and push a pin through the fabric from the front side through the back where the stem is. This way the pointy part of the pin is sticking out by the stem.
7) Place a dot of glue on the ball and push the pin into it. Then nestle the flower all the way into the ball as tightly as you can. This is where a thimble comes in handy!
8) Add two more flowers next to that first blossom so that you've used all 3 colors in a group. They don't need to be super close to each other, but make them close enough that they touch.
9) Keep working your way around the ball with the same process. Add one flower at a time, trying to use a different color than the neighbors.
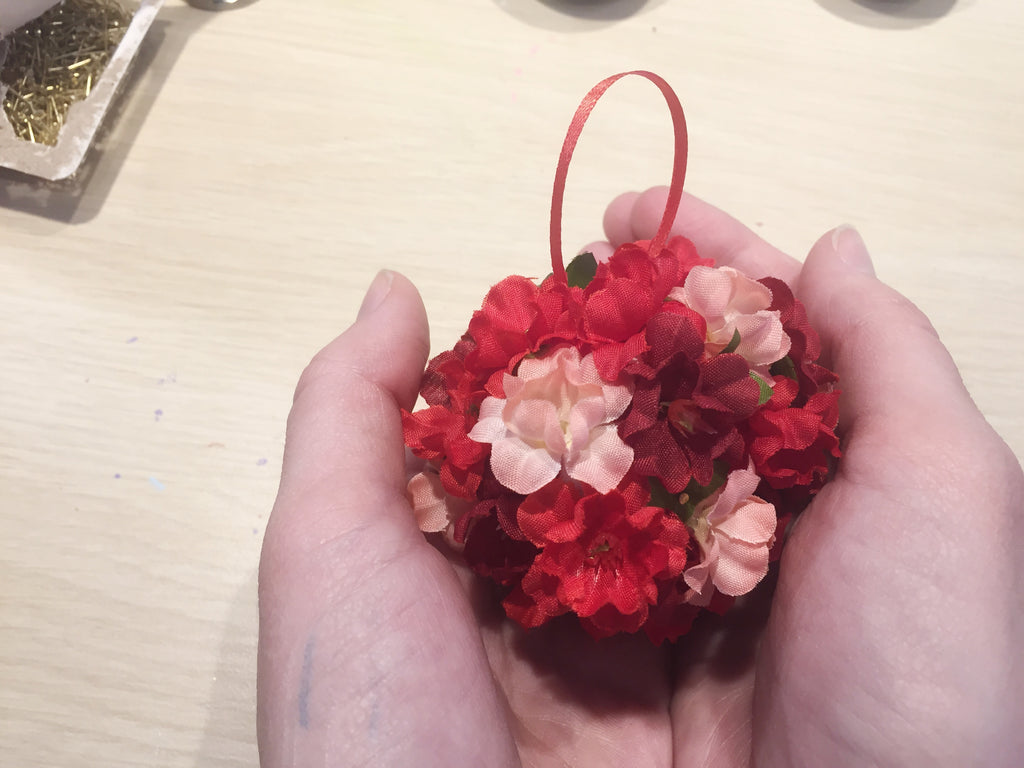
10) When you think you've covered the ball completely, give it a once-over to find empty patches. When you find one, put a blossom in that spot to fill in the emptiness. I found myself adding 4-5 more blossoms after I thought I was "done"!
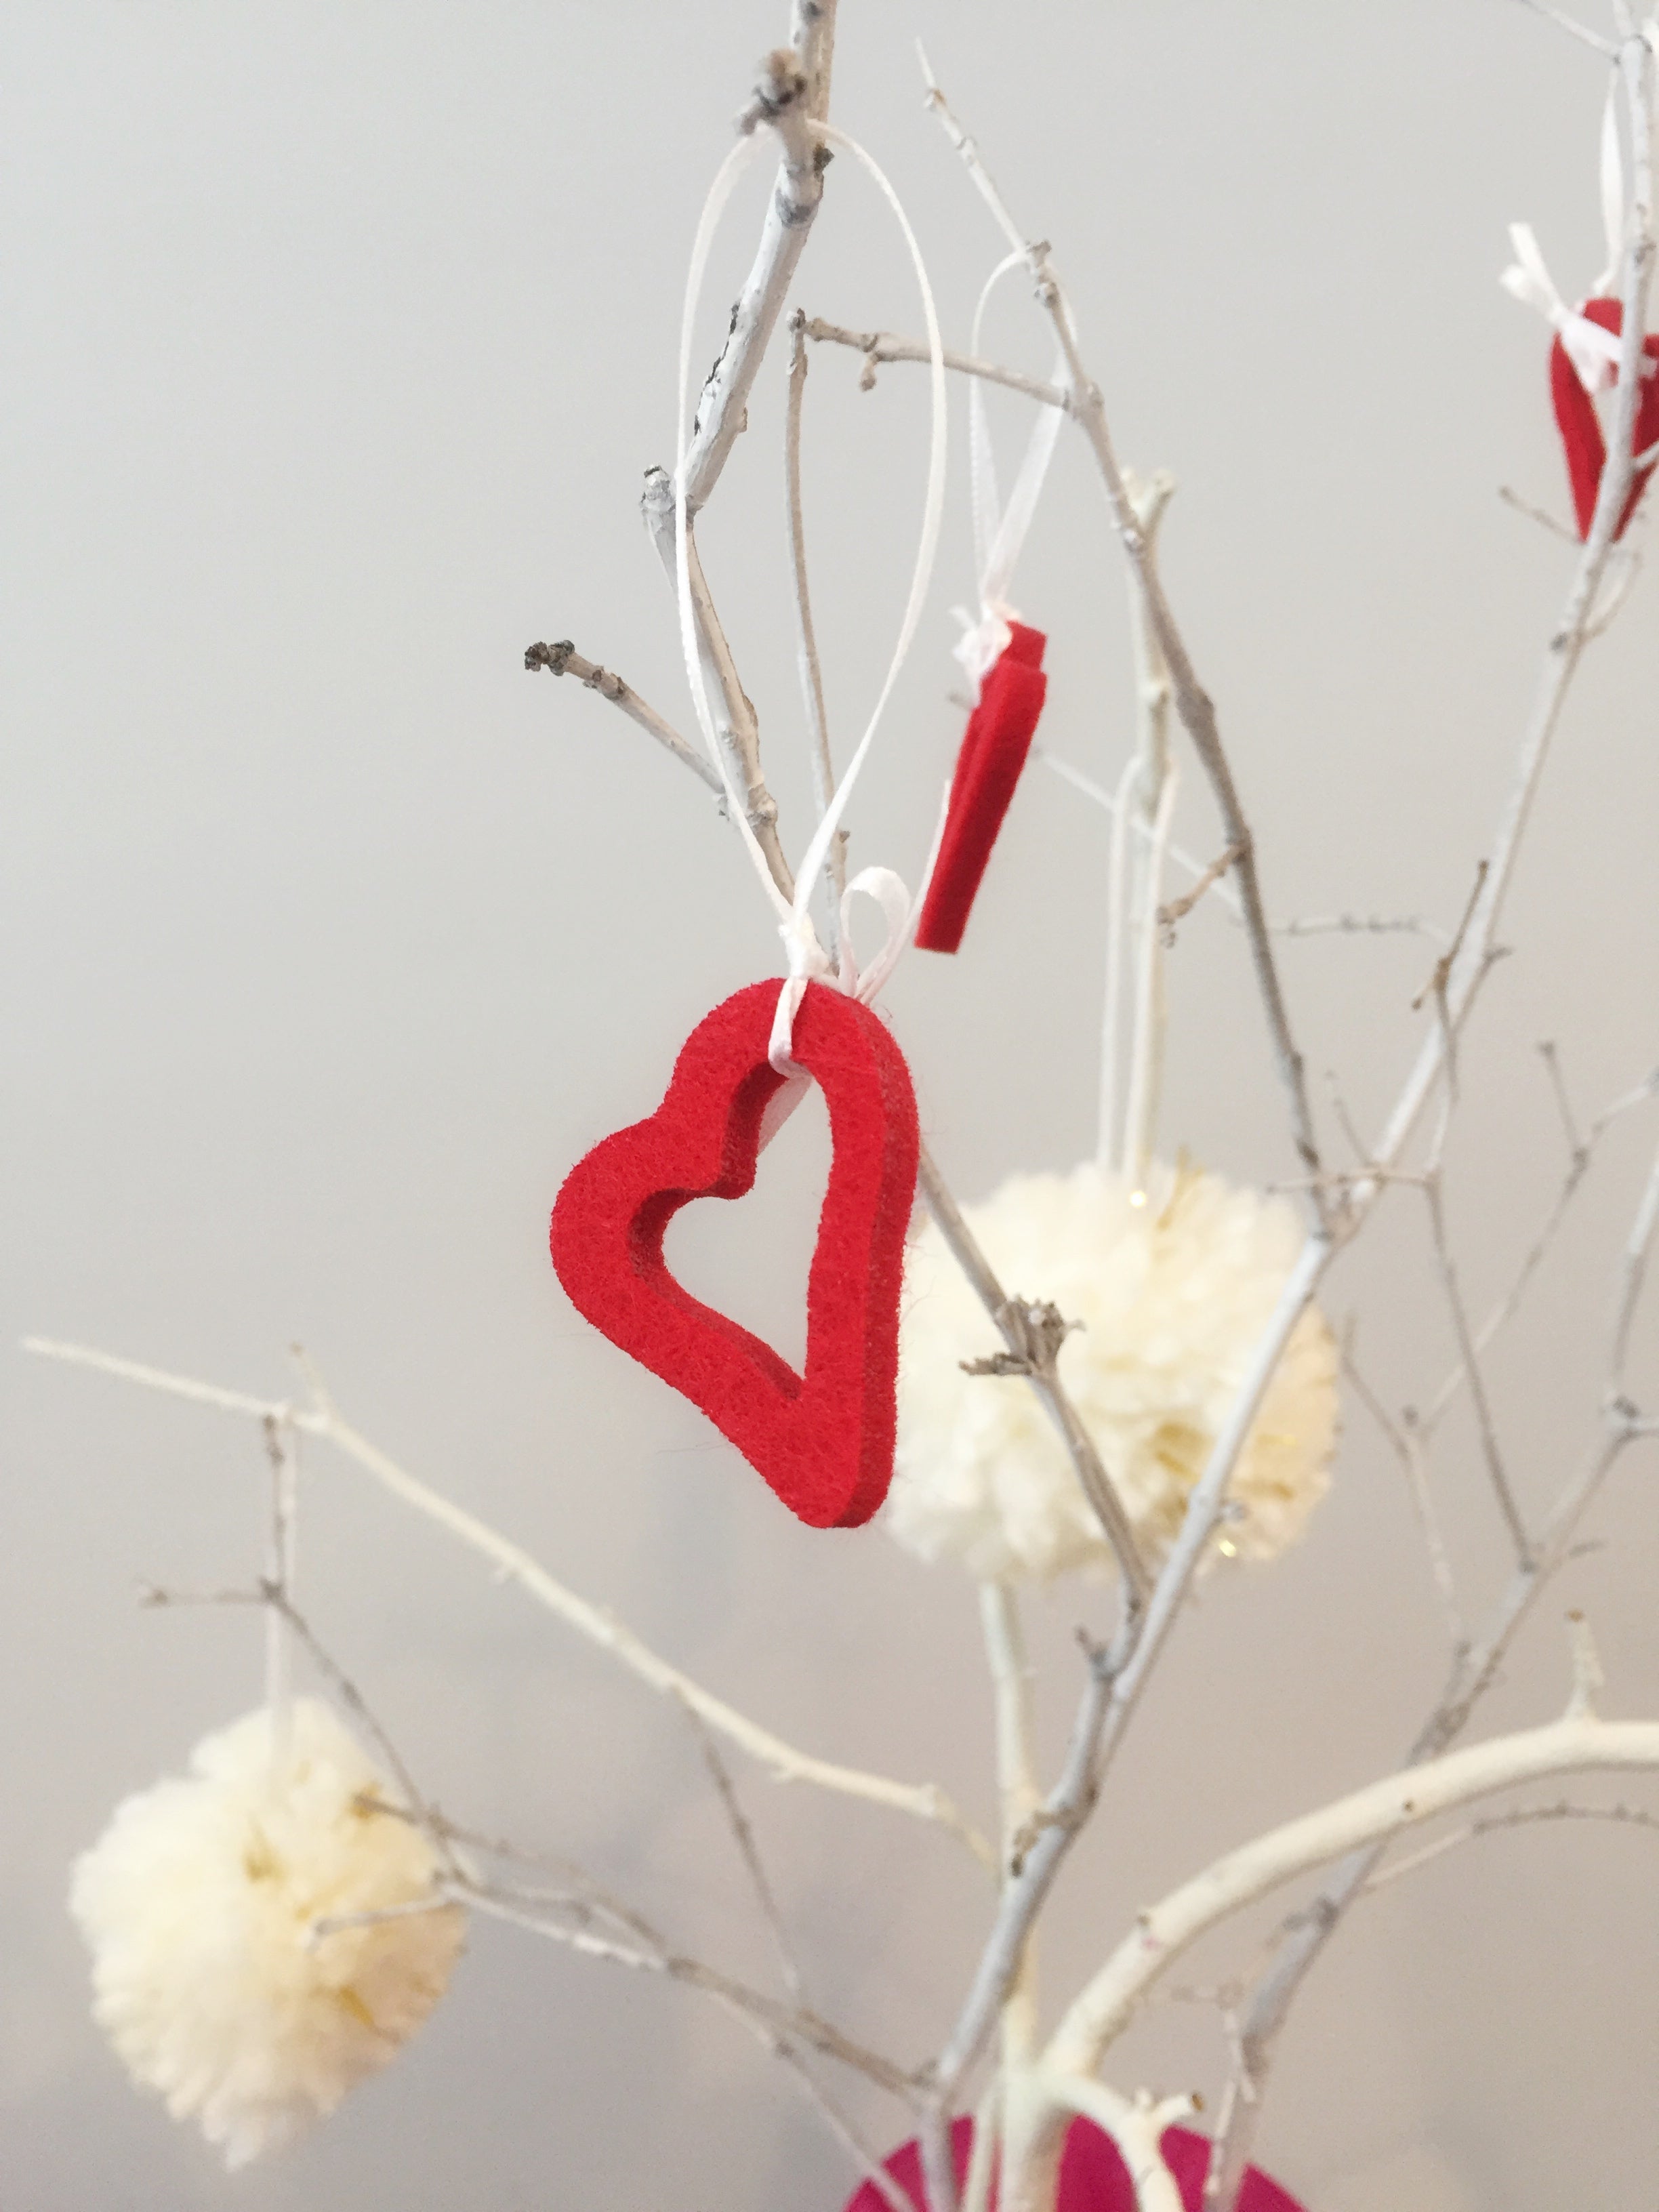
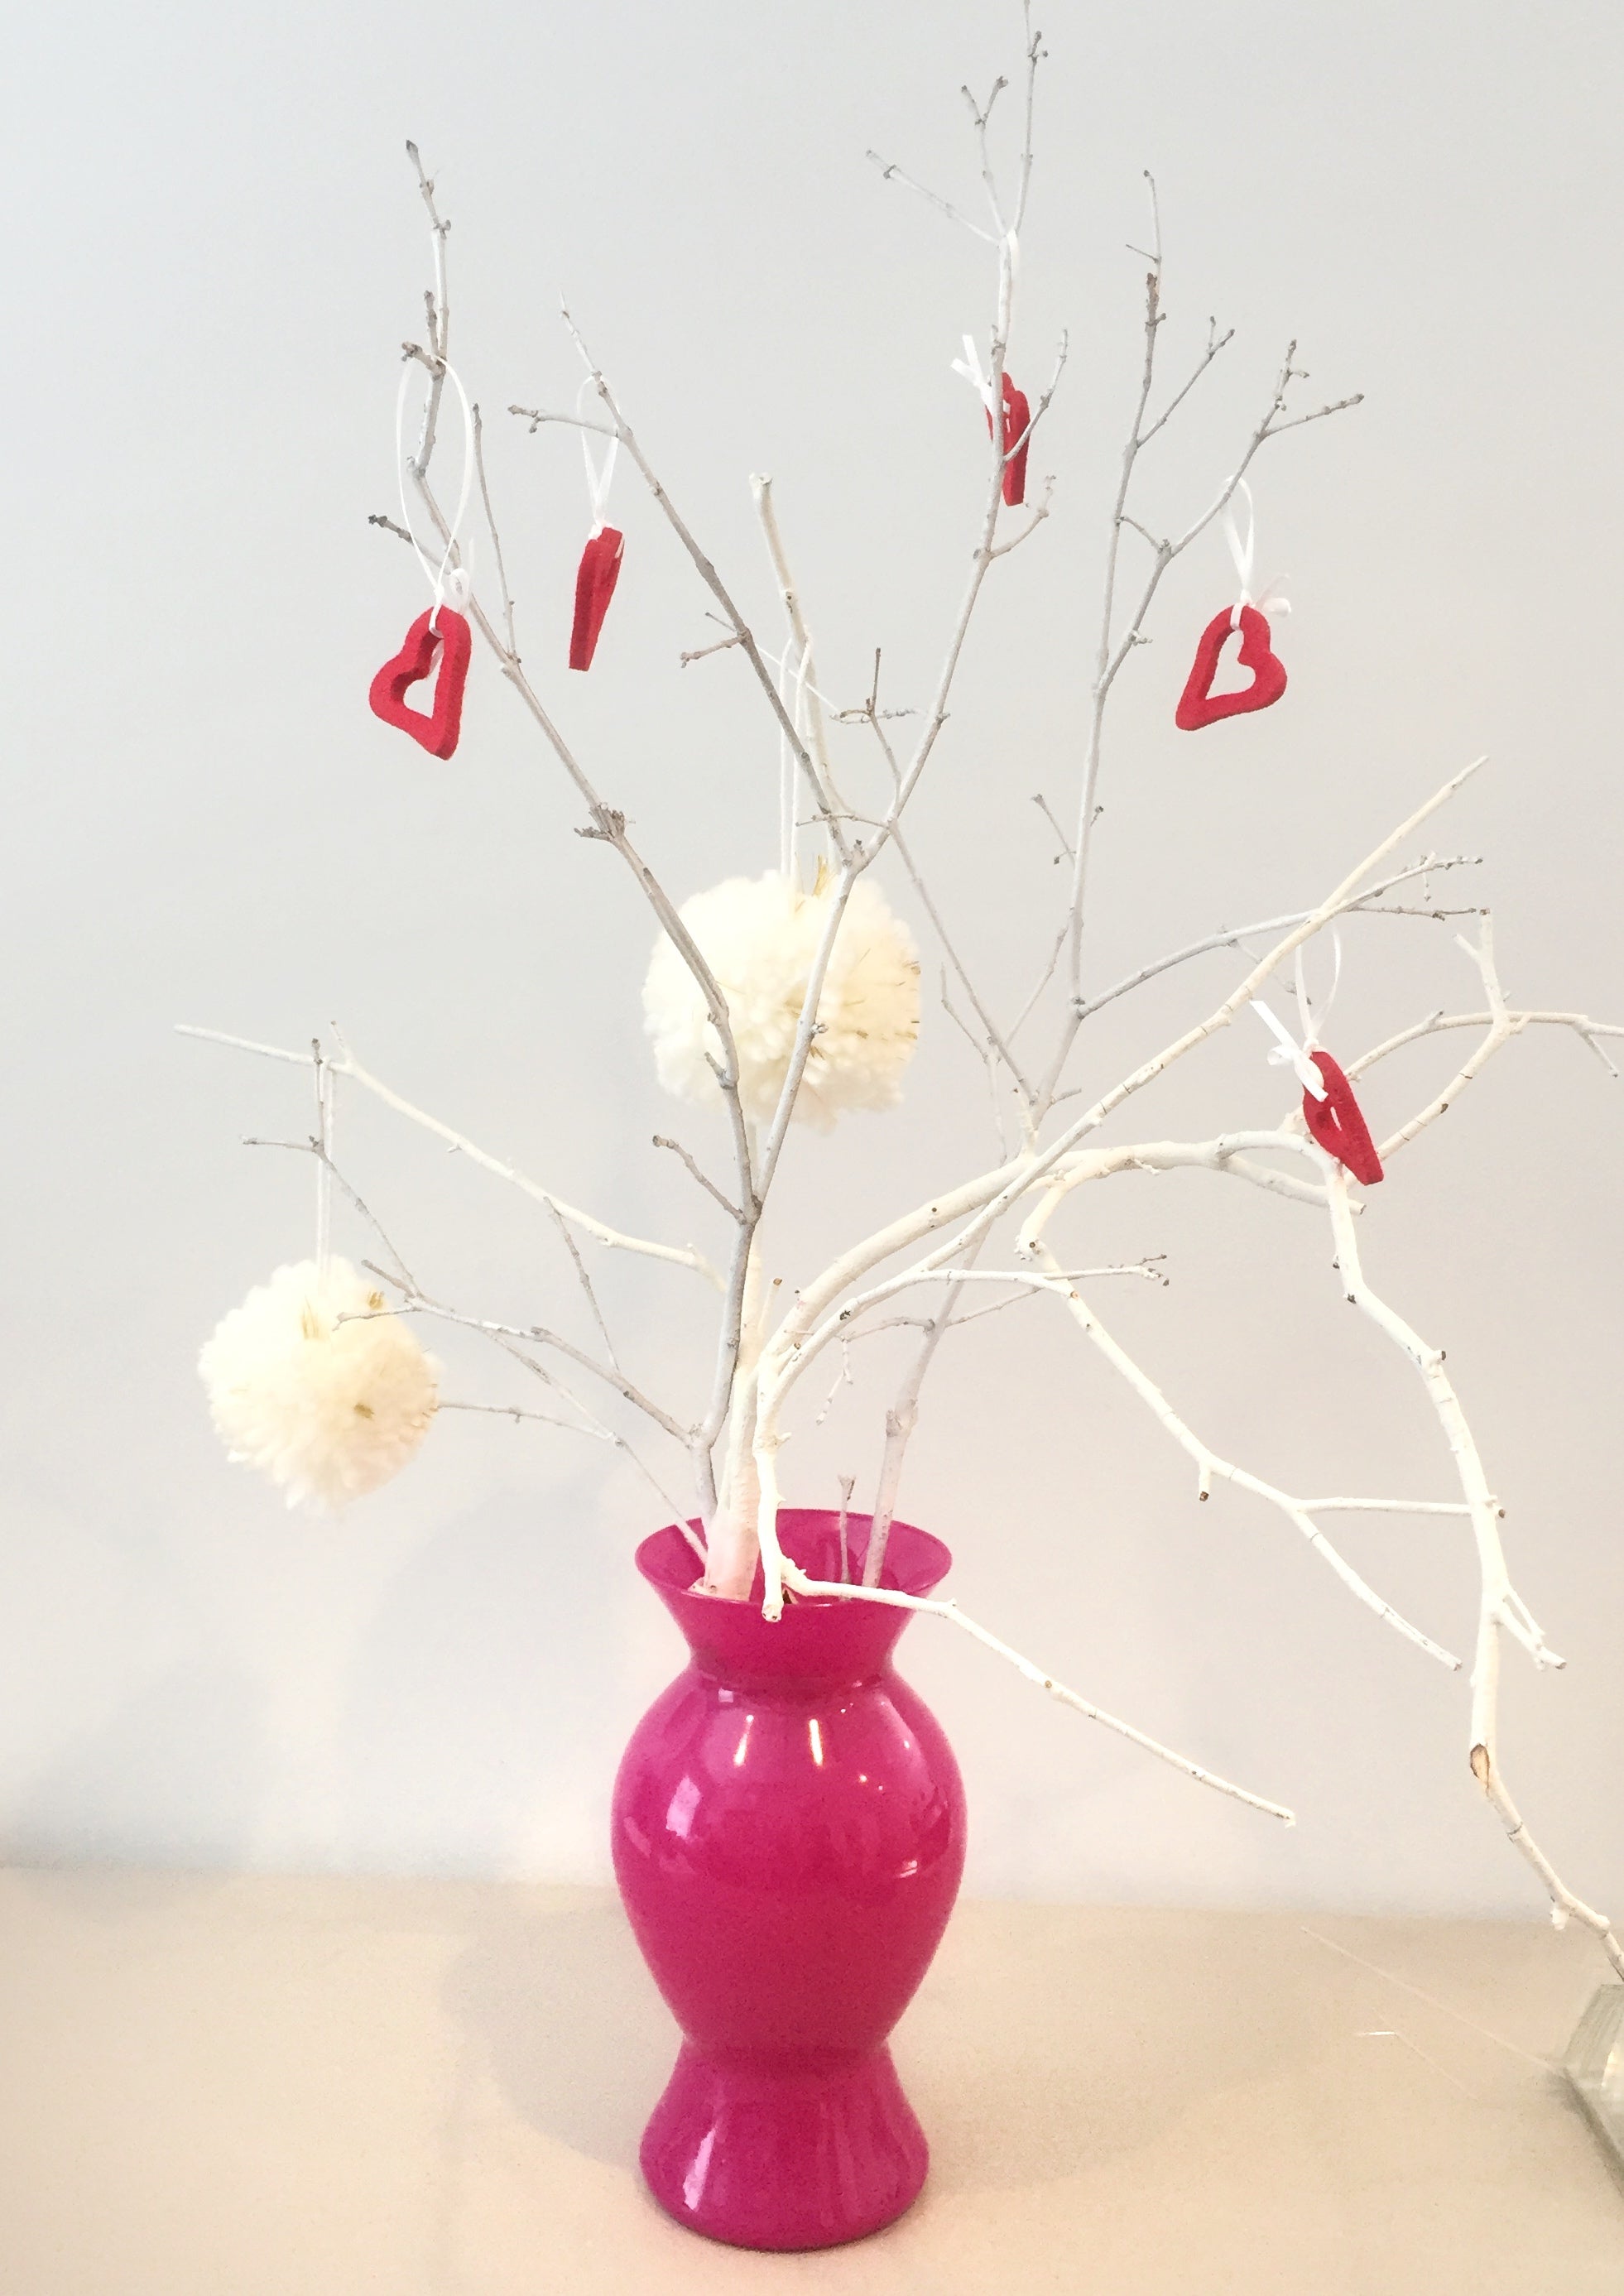
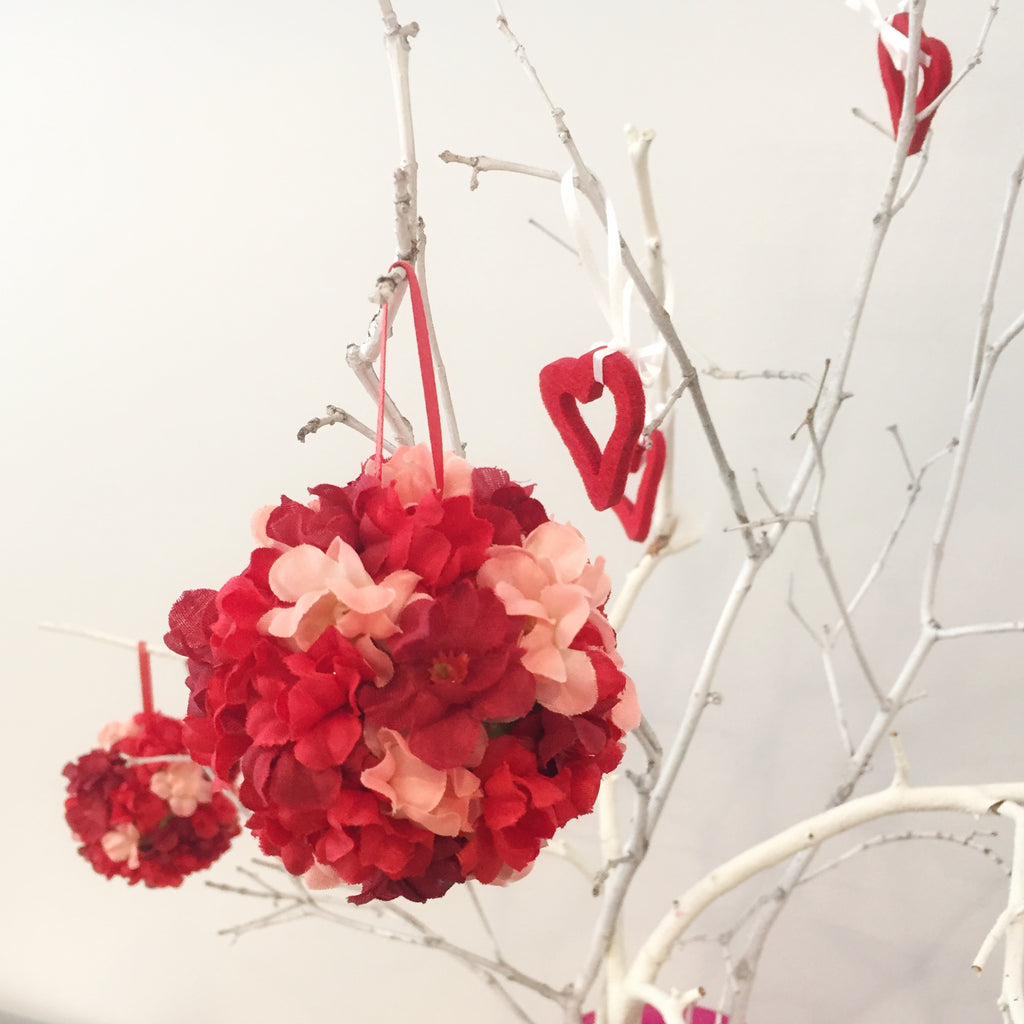
11) Hang your gorgeous new creation on your Valentine's tree
]]>
In this DIY we're going to make some grown up Valentines for your family.
Grown up paper - scrapbook paper or nice stationery
A nice pen or marker
Scissors
Ribbon
Glue
1) Pick some paper. If you have scrapbook paper already, use that. Otherwise you can usually pick up several pieces for $1 at the craft store. If you're shopping, pick up 3-4 pieces. You'll be writing on them. So choose ones with faint designs on the front, or ones with bright designs that show through the back a bit. Keep in mind that for Valentine's Day you'll probably want pinks, reds, or purples in your design.
2) Cut small hearts from the paper (remember as a kid folding your paper in half, and cutting a half heart shape? Do that.)
3) Write a quick note to each family member. Be creative! You could use heart candies for inspiration if you needed to. But what about writing something you love about them? Maybe your daughter has a kind heart. Maybe your son has a flair for telling stories. Maybe your husband makes your coffee in the morning. Or "remember that time..." is always a good place to start.
4) Glue a loop of ribbon to your paper and let it dry.
5) Hang them on your tree with some other decorations. It's up to you if you want to point out the Valentines to your family... or let them discover the notes for themselves. What a sweet surprise that would be!
On the last day of this DIY series, I'll be sharing a craft project that takes a bit of work, but it's gorgeous.
]]>
Ribbon or yarn
Scissors
Glue
Heart decorations from the craft store
Pompoms
Paper mache heart + paint
Glass heart ornaments (shameless plug)
1) Pompoms - you may have some of these hanging around from kids craft projects. Or maybe you are lucky enough to have a pompom maker gadget. You'll obviously need more if your pompoms are tiny, or only just a few if you have large ones. Cut a bit of yarn and tie the ends in a knot. Place a large dab of glue on the pompom and attach the knot. Let the glue dry and you've got a set of colorful, fuzzy ornaments for your branches.
2) Heart decorations - check out your local craft store or dollar store. There are tons of little heart accents this time of year! I snagged these sweet felt hearts with open centers. But I also saw lots of foam pieces, plastic hearts and even crystals. Use what strikes your fancy... and your budget. Add loops with yarn or ribbon, just like the pompoms. I added 5 of my felt hearts to my branches, and they look perfectly sweet.
3) Paper mache hearts - my craft store ran out of them before I started this project (poor planning, I know). But I've seen small paper mache hearts there. I would have loved to paint a few of them with different shades of pink. Think an ombre heart collection. Cute right?
Next up - grown up Valentines for your tree!
]]>But I'm busy, and hand placing petals isn't on my to-do list.
So here's an idea for a simple (i.e. quick and inexpensive) "tree" centerpiece. Even better, we can adjust it to fit the different holidays this spring … stay tuned for more DIY series!
Natural branches
White spray paint
Vase (+filler if the vase is clear) - check your local dollar store for these!
Scissors
My branches were from trimmings this fall. But the polar vortex may not be suitable for chopping off branches (for you or the tree)! So take a look at your local craft store. I found a bunch of birch branches at Hobby Lobby for $7.99 on sale for 50% off. They're nice and long, and there are lots of them to make a full centerpiece.
1) Measure your branches against your vase. Trim off the bottom of the branches to reach a good height.
2) Spray paint the branches with white paint. Do this in a well ventilated area! Or, in other words, brace yourself for the polar vortex and spray quickly. Spray paint needs to be warm enough to dry, so try your garage or basement overnight. That way you won't have to deal with the fumes as they dry. If you'd rather use regular white paint and a sponge brush you could do that too.
3) After the branches are dry, gather them into your vase. Add filler to keep them upright and weighted down. Arrange them so they hang over the edge of the vase for hanging decorations.
Tomorrow I'll share with you a few basic ideas for decorating!
]]>This time, my customer and I chose large (4”!) clear glass ball ornaments. She wanted them to have a snowflake design on them. To make these stand out on the clear glass, I decided to use white paint and top it with white glitter.
I had made a series of snowflake ornaments last year, so I thought, "Easy! I'll adapt the same designs here!" But I had overlooked just how big these ornaments were! My snowflakes needed to be bigger, better, and more detailed than before.
I started with my original snowflake designs. But then I added more details, extra lines, dots, and of course rhinestones. I painted 4 large snowflakes and 4 small snowflakes on each ornament.
Didn't they come out beautiful?
I'm planning to make a smaller version for my shop next Christmas. I never use clear glass ornaments. But this opened my eyes to how gorgeous they can be!
]]>
I won’t be scrambling for last-minute gifts. I won’t be running to the grocery store on Christmas Eve to get baking powder (hopefully before they close). I’ll actually look through those pins that I saved throughout the year and I’ll do some of them.
And every year, I’m still shopping last minute, forgetting ideas I wanted to try, and racing into the grocery store parking lot 20 min before they close.
But this year, I have a new plan. A plan to make those things happen. Ahead of time. With plenty of planning. And pretty worksheets that I’ll want to look at.
I put together a set of worksheets for all of those things, printed them out and put them into a binder that I can add to each year - My Everything Christmas Planner!
And I want you to be able to enjoy it too. Type your email in the box below to get your FREE download of the full 2018 workbook.
Print the whole workbook, and extra prints of certain pages depending on what you need. Use the pages for yourself as many times as you want to start your own binder!
I hope you love your planner pages! Are there any other planning pages for your holiday season that you’d like me to include? Leave your ideas in the comments!
]]>
Wait! Before you panic… here's what you need to know.
Then why am I making this change? It’s something I’ve debated behind the scenes for years. Sure, there’s a benefit to having everything under one roof. But I've always felt that there was a disconnect between my collections.
To be honest, when I said "debated," that was an understatement. I’ve struggled with this decision for years. But I've also struggled with the balancing act of running both collections in the same store.
Case in point: whenever I communicated with my followers I felt like I was leaving out half of my followers….
My spring newsletters would introduce new notecard designs or my newest flower painting. But those months my ornament customers may have felt forgotten... or worse... they may have wondered why they signed up for a stationery newsletter! My fall and winter newsletters introduced new ornament designs and decorating ideas. But those months my stationery customers got left out of the loop.
So, the time has come to give each collection its own home. They each deserve a chance to thrive in their own spotlight .
I suspect some of you are thinking that I'm jumping into a big, unnecessary change. But I’ve looked at all the information available to me about the history of my shop. I've weighed all the possibilities. And I know that this change is going to benefit both collections as they both move forward.
Here's what you can expect. The Harmony Mill Paperie Etsy shop will be completely by mid-May. Meanwhile, both shops will be open during the transition.
I am so very thankful to all my followers. For both collections! And I look forward to growing them BOTH with you for many years to come!
Rediscover my stationery and wall art collection at Harmony Mill Paperie:
www.harmonymillpaperie.etsy.com
Or shop my collection of Christmas ornaments and Easter eggs at Phylogeny Art:
]]>
"How do you get the stickers on your ceramic eggs attached so perfectly?"
* crickets chirping *
A customer asked me this question at my spring craft show last week. The answer was simple – I don’t use a sticker. I paint them. But the response was surprising. They couldn’t believe that they were all hand painted.
I assure you, my wonderful followers, that I paint every egg and every ornament myself. No stickers. No minions. Me, with my paints and my brushes.
In fact, I jokingly told him that if he looked hard enough he would see where I made mistakes.
…But then I also begged him not to look so close, for the same reason!
"Then why are they the same as my notecards", he asked.
Because I loved those designs so much. In building a collection of egg designs, I looked back at my own design inspiration – my stationery. I could put the cards next to each other and choose the best collection.
"Then why do they look exactly like the notecards", he asked.
Because I’ve painted more monarchs than I care to admit… at some point they become less of a challenge. Besides, I used my own notecard design as inspiration. I was familiar with this exact design already. Why reinvent the wheel?
Bottom line, my lovely followers: No, I don’t use a sticker, but I do follow my own design as a template and hand paint each egg myself. Then after it dries, I varnish the ceramic. That way when you dust off the eggs and put them into storage, the paint won’t get scratched or tarnished.
If you ever think of any questions you have about my work, feel free to contact me! I’m happy to answer any questions about what I do… and you’re probably not the only one!
Tell me, friends, did you think my eggs or ornaments were made with stickers? Do you have any suggestions on how I could communicate that they're hand painted any better?
]]>
If I had a mirror, I expect that I turned bright pink at this very moment. The answer to the question was a flat-out "NO!" but I couldn't say it that way!
Instead, it opened my eyes. Immediately.
To answer the question, I paint every ornament myself. Every one. Every single one. Hundreds a year. With my own two hands, my own brushes, my own paints, in my own studio. They're my miniature works of art - each and every one. And I take great pride in that!
To learn more about my painting process, jump over to this blog post from last year.
I even spill the beans on a few of my favorite tricks and tools!
Don’t get stuck in the Easter basket mindset!
You can use them in so many different ways to decorate your home for the holiday.
I gathered some of my favorite ideas onto an Easter board on Pinterest. Get inspired to create a gorgeous Easter centerpiece or accent in your home with my (or any) ceramic eggs.
Jump over to my Pinterest Easter board and get inspired!
With Christmas approaching each year, Gram had a new ornament design to try. Some were stitched, others beaded. But painted ornaments were my favorite. They turned into miniature works of art. They were nothing like what I paint today! Those aged glass balls with their trains and snowmen and trees - they're priceless.
I started painting ornaments again after Gram passed away. Getting back into painting them was an emotional challenge. But that first year I gave them as Christmas gifts for family members in memory of her.
My shop grew from that first collection of ornaments. Since then, each ornament I've painted has reminded me of Gram. I get such joy knowing that each ornament brings cheer to someone's holiday home.
She would have loved to see this.
Okay, that might be a bold statement. But think about family heirlooms. Would that platter from your grandmother be as cherished if it were plastic? Sure, you'd love it because it was hers. But I would think you would be far less concerned about it if it couldn't break.
I like to think of my ornaments as modern heirlooms - holiday treasures to give and to save.
Cherished items that your kids or grandkids will want to have on their tree someday.
I just don't think that a plastic ornament could hold that same value.
But I admit, we should address the elephant in the room. Painting on glass ball ornaments has its challenges. They're slippery and fragile, and that makes painting on them stressful.
If you have kids or grandkids, you've likely attempted to make a keepsake ornament... probably from an idea you saw on Pinterest. If you have, then you know exactly what I mean!
Have I broken them? Yes. I can confirm that they will break if you drop them... and for me it usually happens right as I'm adding the last finishing touches. But I've also gotten used to handling them so it's not as common as you might think.
What are my suggestions for you handling them?
If you buy one of my glass ornaments, it will arrive in a rigid gift box tied with a bow. My suggestion is to keep using that box for storage after the holidays. It's sturdy and reliable, and it will keep that ornament safe for years to come.
Leaving an ornament hook attached will also help as you take it in and out of the box each year.
If you have children or animals, hang it up higher on your tree for safety and peace of mind.
You can also wire it directly to your tree for extra security. Use floral wire from the craft or garden store to wrap the ornament right onto the branch.
Or do what my mom does - hang it up on an ornament stand (or chandelier, or wall sconce, or even in a wine glass on the mantel)... and leave it there. All year. Don't even touch it. Just look at it. Forever. That's an option too.
]]>
But I never write them down immediately (especially when I'm driving!) I mull them over for a while. I work out the intricate details in my mind for a few days until I'm satisfied with the design in my head. Then - and only then - am I willing to sketch the design into my notebook.
My thought process pays extra attention to adding special details to each new design. To me, those finishing touches make all the difference. My favorite extra-special detail? The tiny crystal I add to the center of the North Star in my nighttime forest ornaments.
Then I paint a prototype. Sometimes those prototypes don't go how I expect... and my designs need some adjustments before I put them into my shop. Almost always I make a small batch of a new design first to sell at local events. The feedback I get from those samples, and how well my customers respond to the design, tell me whether to make more.
Interested in knowing about the newest designs and my small batch pre-launches? Sign up for my newsletter and you'll hear about them first! Click "Subscribe" to the left!
]]>
I've developed a few tricks over the years. Of course, I can't share them all with you! That would be bad for business. But here are the top 3 for you to get an idea of what goes into your favorite ornaments.
1. Not all paints are created equal. So I choose my paints very, very carefully.
I spent a lot of time deciding what brushes I like to use. At first, I thought I needed an expensive brush to get tiny details. But even those expensive brushes got old and frayed. I decided that for what and how I paint, brush price doesn't matter as much. I like the Snap! brushes from Princeton and choose the smallest brush size for tiny details. I prefer a number 0 round for everything from lettering to branches, and a number 3 for larger elements. But I also love my tiny Filbert brushes for filled areas, and I have a great angle brush for making my pine trees. They're all Snap brushes, and I love them (bonus - they're inexpensive to replace when they get worn out).
3. Fall back on your childhood techniques, and have fun.
As a child in the 90's, I decorated more than my fair share of clothing and accessories with puffy paint. As it turns out, all that practice made me quite good at making swirls and tiny snowflakes! I've evolved a bit, though. Instead of puffy paints, I use a special applicator bottle with a tiny metal tip. Put in Martha's paint, and I can create a whole range of designs with that tool.
So there you have it. My top 3 behind-the-scenes trade secrets. I hope it helped you see a bit more into the work that goes into creating my ornaments! You can shop my full range of ornaments at my Etsy shop, Phylogeny Art, and find a select grouping of my best-sellers on this site as well!
Happy holidays!
]]>
But I didn’t expand on who I think those gifts could be for – Captain Obvious would say mothers.
Yes! Mothers. Not just your own mother, or the mother of your children. There are lots of lovely ladies in our lives that deserve a gift to say thanks for caring so much all year long, and Mother's Day can be a great day to do it.
]]>In my last post, I wrote up a Gift Guide for Mother’s Day and I loved thinking of all of the beautiful gifts that might come out of those suggestions.
But I didn’t expand on who I think those gifts could be for – Captain Obvious would say mothers.
Yes! Mothers. Not just your own mother, or the mother of your children. There are lots of lovely ladies in our lives that deserve a gift to say thanks for caring so much all year long.
A few weeks ago was International Women’s Day. I work with a lovely girl who is from Europe, and that morning she gave me a hug, complimented what I was wearing, and said “Happy International Women’s Day!”
Okay, I had to ask… what’s the big deal? I’m not a hugger, and I was wearing my normal outfit. Naively, I said I had seen it on the Google Doodle, and asked if it was like all of those other “holidays” that are springing up all over the place – Coffee Day, and Donut Day, and Waffle Day (I love breakfast foods).
No, apparently in other parts of the world, International Women’s Day is an actual thing. Much like Mother’s Day, where you take time to celebrate mothers and women and shower them in love and appreciation. (She also told me that in her country, a child’s birthday is also a celebration for the mother, who continues to receive cards and gifts every year on her child’s birthday! Heck yes!)
So let’s think about this – in the US we have Mother’s Day. We give our mom a nice card and a gift, and we often stop there. But what if we use the day to really spread some love to other special women in our lives, or women who just seem like they could use the extra pat on the back? Here are some that come to mind:
In these cases, a small treat or a nice card can go a long way. And it doesn’t even have to be an “I love you Mom” card, but rather a nice written note saying “you’re doing a great job, Happy Mother’s Day,” Just so she knows someone really is noticing, and that she’s appreciated.
Handmade gifts are always unique and special - let's be honest, your mom will always love anything you make for her.
If you're a crafty type, plan to drop back in to the blog next week for a series of DIY tutorials for Mother's Day gifts.
But let's also be honest here. There isn't always time for making that perfect handmade gift…
So with a few weeks left until Mother's Day this year, I've done some searching on Etsy. I found some great handmade gift ideas that would be just as unique and special… and don't require a trip to the craft store!
Here are 5 that caught my eye from a search for Mother's Day Gifts on Etsy.
]]>
Mother's day is on May 8 this year. I love giving gifts to my mom for her special day, and I bet she's not alone in loving to receive unique items that seem like they exist just for her.
Handmade gifts are always unique and special - let's be honest, your mom will always love anything you make for her.
If you're a crafty type, plan to drop back in to the blog next week for a series of DIY tutorials for Mother's Day gifts.
But let's also be honest here. There isn't always time for making that perfect handmade gift…
So with that breakdown in mind and a few weeks left until Mother's Day this year, I've done some searching on Etsy. I found some great handmade gift ideas that would be just as unique and special… and don't require a trip to the craft store!
Here are 5 that caught my eye from a search for Mother's Day Gifts on Etsy. ❀
This Herb Seed growing kit is just one seed growing kit from Mountain Lily Farm on Etsy, and I chose it because herbs are just so incredibly handy and delicious. But I would be lying if I said I wasn't having a hard time choosing between their Butterfly Garden seed kit or the Mother's Day Wildflower seed kit. This shop is in Arkansas and has a wide range of options for the gardening enthusiast. I highly suggest visiting and taking a look around - you'll definitely find something for mom… and your aunt. And maybe a few other people too.
I love this selection of bath and spa items, and I do not say that lightly. I'm not one to give bath items as gifts. I think it's such a personal decision to make - fragrances, ingredients, textures. But the Elegant Rose Boutique shop from Michigan has quite a collection of items that are made from simple, natural ingredients from the start. The gift set contains a selection of different items with different textures that's sure to make any mom find something she'll like (Not sure if she's a bath bomb kind of mom? She can find that out herself. But if she's not, she'll probably love the bath salts.) Add to that a selection of three fragrance families (citrus, lavender, or floral) that you get to choose from based on her personality and you're sure to have a gift she's sure to enjoy.
I am in love with this mason jar cutting board, with its sweet mix of nostalgia and "let's get cooking." This shop from Florida offers this cutting board (and many other designs too, including a whole section for Mother's Day gifts) in a whole list of sizes and wood options - and if "Nana's Kitchen" doesn't fit for your particular Mother's Day needs, they'll customize it and change the name for you. The tears coming down her cheeks won't be from cutting the onions when she opens this gift.
There are lots of mugs on Etsy, and plenty that have this same quote for "Home is Wherever Mom is," but this one stood out to me. The combination of its feminine colors, classy style and lovely script really makes this one a mug that I would pull out of my own cabinet each morning - not to mention that it comes in two sizes depending on how much coffee mom likes to drink, and it's top rack dishwasher safe. The designer is in Massachusetts and makes them herself in her home (she doesn't have them mass-produced in a factory, which is all too common in mug shops). While you're shopping for mom's mug, she also has designs for your yoga-loving over-caffeinated best friend too.
❀ There are the five I came up with, but of course that's just 5 of SO many things on Etsy to find.
And if you're not familiar with Etsy yet, well, you're just missing out! This Etsy Help article is an Introduction to Buying on Etsy and is a great place to start (with links to where you can get further information to any other questions you might have).
]]>This ornament is stunning and would be a gorgeous addition to a winter wedding. Winter brides who are looking for favors that are truly as unique and memorable as their special day will really love this ornament.
]]>
I'm overjoyed that Huffington Post Canada Living highlighted my hand painted White Birch ornaments as #12 on their list of "26 Wedding Favour Ideas your Guests Will Love" this January!
I kept seeing occasional traffic coming into my Etsy shop listing for this ornament from Huffington Post Canada, but it was sporadic and hard to fathom.
Until I Googled "Huffington Post Canada wedding ornament" - and there it was! Be still, my heart.
This ornament is stunning and would be a gorgeous addition to a winter wedding. Winter brides who are looking for favors that are truly as unique and memorable as their special day will really love this ornament.
As for practicality, they come boxed in a gorgeous hinged box and tied with an organza bow - ready for giving and great for display at your venue or on each place setting. And when it comes to giving a memorable favor, this is ideal - each year your guests will remember you and your beautiful day when they hang your ornament on their tree.
You can order a sample of this ornament by heading over to my Etsy shop and purchasing the wedding favor hand painted ornament listing. You can also send me a message there if you'd like to talk specifics about your wedding or event.
You can also learn more about my ornament line by visiting my About My Ornaments page.
]]>